Wizard Recommends
 100 % up to
2250zł +200 spins- Massive gaming platform
- Crypto-friendly
- Loyalty program

 120 % up to
1200zł +50 spins- Welcome bonus package
- Loyalty Program
- Participate in Slot Competitions with Huge Prize Pools
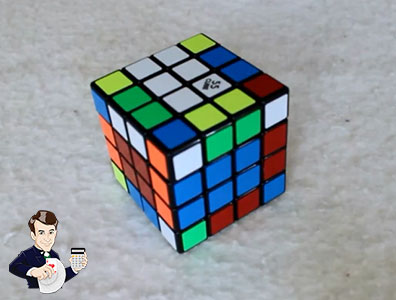
Video Guide to Solving Rubik's Revenge -- First Part of Two
Basic Edge-Flipping Method: R U R' F R' F' R
Hello everyone, I'm Mike. In this video, which is the first of two, I'm going to guide you on how to solve the 4x4x4 Rubik's cube, commonly known as Rubik's Revenge . If you enjoy this tutorial, consider giving me a thumbs up or better yet, subscribe to my Wizard of Odds channel.
In this video …
In this session, I'll be teaching you how to resolve everything except the final layer of the cube. I won’t delve into notation since you won’t be required to learn any algorithms here. The second part will have algorithms for tackling the last layer, especially regarding several parity issues. This video will take a gentler approach.
Before we delve further, I have a few announcements
Firstly - it's essential that you already know how to solve a standard Rubik's cube. I'll be utilizing a lot of concepts that you should be familiar with from your experience with the classic cube. Be prepared, as I may move a bit quickly, assuming you’re already comfortable with it. Rubik's cube .
Next - it's crucial to understand that with any cube that has an even number of squares along its edges, these cubes lack a center piece like those on a typical Rubik's cube. As a result, you can choose any color for the center pieces, but if they are not aligned correctly, you'll encounter a problem where it becomes impossible to solve.
The majority of Rubik's cubes, regardless of their size, usually have yellow directly opposite white. By placing red to the left with white on top, you'll find blue on the side, with orange opposite red and green opposite blue. This is the conventional color arrangement. I'll be demonstrating this on a standard cube known as the 55 Cube, which I believe most popular brands manufacture in this manner.
As a word of warning …
Here’s my old Rubik's Revenge that I owned back in high school during the early '80s. You can notice the difference. Blue is positioned across from white. If blue is on the left while white is on top, yellow will be here. If your Rubik's Revenge is all mixed up and you're unsure of its configuration, you can always solve the colors to determine the proper orientation of the faces.
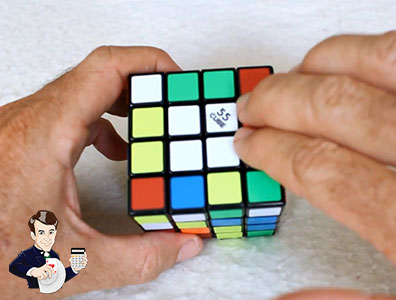
With that in mind, let’s mix it up and get started. We'll give this a good shake. Now it looks nicely scrambled. The first step is to select your starting color for the face . I generally prefer white. What we're aiming to do is to establish a white center, meaning we want all four positions to be white. You should be able to find at least one face that has white on it.
I'm going to trust that you can apply some logical reasoning here. For instance, you can simply rotate this piece up here to acquire two white squares. Then, there’s a white here and here, so I will move this over, allowing it to pair with this one, and then just rotate it to place them at the top. That's the white face complete.
As I mentioned earlier…
…on the opposite side of the white face, a yellow face is necessary. There’s already one yellow in place. Let’s lift this yellow up, move the other two pieces out of the way, and then return them to maintain our yellow configuration. Here are the other two yellow pieces that need to be next to each other. I will move one to the top, turn it this way, and then bring it back down alongside its counterpart.
If I were to simply turn this in place, it would disturb the white pieces . You will frequently encounter this scenario. To get these two yellow pieces in place, position them where the yellow pieces already are, then rotate that section 180 degrees to take them out of the current arrangement. After this, shift the yellows back. As you can see, this keeps our whites intact.
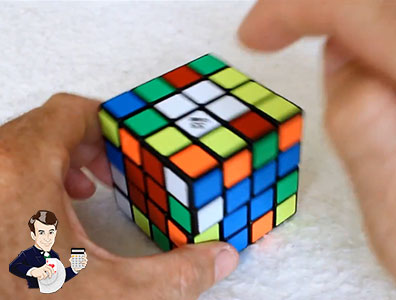
Now that we have our white and yellow centers established, let's move on to the red section. With white at the top--at this stage, the reds can be placed anywhere. Here’s one red piece. Let’s manipulate this red into position so we have two reds next to each other, and then align them on the same row. Just a reminder, rows extend horizontally while columns are vertical. I've got one red alone here, and another solitary red here. I can adjust this until they're adjacent and then align them in a horizontal manner, effectively joining these two sets of reds. This completes our red center.
As previously mentioned, with white on top and red on the left, blue should be positioned on the right. It might be tempting to leave the oranges as is, but trust me, getting to the finishing stages would lead to a situation where it can't be solved. In fact, you'd realize before even getting that far that there are no edge pieces linking red and orange.
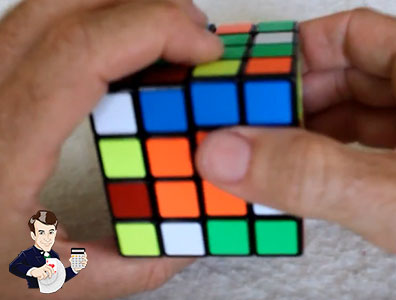
What I'll do is - shift these two blue pieces where the oranges are, taking them out of the flow of operations, and then restore the reds to their correct spots. Here we have two blue positions sorted. Now let’s find the other two blue pieces and bring them side by side. I have two individual blue squares, so let’s unite them, ensure they are in the same row, and correct those reds.
Here are the two blues alongside the remaining blue pieces :
To get these two blue pieces situated, I'll employ the same technique I previously demonstrated with the yellow pieces. I'll relocate these blues to match where the other blues are located, then rotate that layer 180 degrees to pull them out of the working area, and finally move these two blues back to their original positions. Here I have my red, white, and blue. Opposite of red, we require orange.
This is an unusual case where there are no oranges positioned correctly. From my experience, you won't have to memorize this, but if you encounter a scenario where the faces essentially need to swap completely, you can utilize this technique:
You simply need to rotate one half, turn the top 180 degrees and return them back down, and then do the reverse, turning that side to the top 180 degrees before bringing it back down. Let me illustrate a situation that you might frequently face.
Let me describe another common occurrence:
Here we find our red face, requiring an orange on the opposite side. Only one piece is missing. Place the orange face directly in front of you, and on the top, position the necessary piece in alignment with where it should go on the front face. For instance, if it needs to be on the top right, put it in that spot on the top face.
Our next step involves shifting these two to the top, rotating them, then moving the piece adjacent to the empty space into its rightful position, followed by returning it to its place. You might think, "Oh, that's going to disrupt everything else,\" but take my word for it, it will all come together in the end. I won’t go into the details of why, as I might lose you, but trust me that it is effective.
Everything appears to be correctly placed. Top right, top right. I’m going to lift these two to the top, rotate it so that the blank space is on the opposite side, and then adjust these two pieces in their place. This completes that blank position. We'll revert that to its original orientation and then down. Now, we see two oranges paired together and we can position them correctly. Turn that to the left side, and down. Wow. Look at that! Not only have you completed the oranges, but--Well, we were only left with greens. They've been solved too! Believe me, it works.
Let me show you yet another scenario you often encounter. Here’s a familiar situation - We've got our red face. The orange needs to be on the other side. Let's place the missing orange on top. We'll aim to put two oranges here. Again, just raise them to the top, but where oranges are already present, move them to the opposite side, and return them. Done! The centers are complete.
Now, let’s discuss another situation you might frequently face. For our last example, here is our red, indicating we need orange placed there. We need two oranges located in this spot, which should be set kitty-corner on the top surface. Our approach will be similar to the previous example where we had only one piece missing, done twice.
For instance : to position an orange precisely here, ensure that there’s an orange in alignment on top. What we're going to do is essentially shift this orange into the designated spot. Lift it to the top, adjust it so it's on the left side, spin that left section to the top, then move these down and back.
Now we have three out of four centers solved, putting us in that earlier scenario where there's just one piece remaining. Once more, it’s vital that this piece is in the same position on top. Top right, top right. Our core task will be to move this piece to this space. Lift it to the top, adjust it so the empty space is situated on the left, and shift this piece into place followed by lowering these two back down and positioning them back. This is how to fix the last two centers. I hope it made sense.
Now, we're ready to go on to the edges…
Uncover the Finest Online Casinos Available in Your Nation
Calculator for Lottery Jackpot Ticket Sales
Exciting slot tournaments offering huge prize pools
Basically…
First Part of a Video Review: Rubik's Revenge
Let's do another one
Basic edge flipping algorithm: R U R' F R' F' R
Let's do it again :
Hello everyone, I’m Mike, and welcome to the first installment of my two-part series about solving the 4x4x4 Rubik's cube, often referred to as Rubik's Revenge . If you enjoy this content, feel free to give it a thumbs up or, even better, subscribe to my Wizard of Odds channel.
In this video, I’ll guide you through solving everything except the final layer. I won’t cover the notation since you won’t need to memorize any algorithms here. In the second part, we'll tackle the final layer, which involves some tricky parity-related issues. This first part will ease you into the process.
Before continuing, I have a few announcements to share
First - You should already know how to solve a standard Rubik's cube, as I'll use concepts and logical reasoning based on that understanding. I might go through the steps quickly, so ensure you're comfortable with the basics.
Next - Let me clarify an essential point regarding cubes with an even number of pieces. In these cases, such as this one, there is no designated center piece like in the standard Rubik’s cube. This means you can choose any color for the center pieces, but if their arrangement isn't correct, it will cause issues down the line.
Typically, most Rubik's cubes have a setup where yellow is directly opposite to white. For example, with red on the left and white on top, blue would take the front position, orange would be opposite red, and green would be opposite blue. This is the conventional color layout, and I’m utilizing this standard 55 Cube, which most manufacturers follow.
Here sits my old Rubik's Revenge that I cherished back in high school during the ’80s. You’ll notice it presents a different color scheme. Blue is opposite to white here. If you position blue on the left with white above, yellow will be in front. If your cube is jumbled and you’re unsure of its configuration, simply resolve the colors to see how the sides should align.
With that covered, let's get to mixing this up and begin our solvation process. Let's scramble it nicely. Now, step one is to choose your starting color for the face . I personally prefer to start with white. Our objective here is to position this white center correctly, ensuring that all four surrounding pieces are also white. You can usually find a face with at least one white piece.
I’ll trust your common sense to guide you through. For instance, you can easily maneuver a piece here to connect with another one. So now we have two whites aligned. Next, this white in this position can move here to be beside the other two, and we can then shift them upwards to complete our white face.

We have now pretty much…
…across from the white face, you should establish a yellow face. There's a yellow piece already present. Let’s elevate this yellow further, reposition these adjacent pieces for safety, and then return them to keep the yellow intact. We also need to position the remaining two yellows next to each other. I’ll elevate one, rotate it, and then bring it down to achieve adjacency.
If I were to rotate this mistakenly, it would disrupt the whites . This is common, indeed. To correctly place those two yellow pieces, we lift them up to where other yellows exist and rotate them away from the center to ensure they aren't interfering. Then, we can move them back into position without disturbing the whites.
With the white and yellow centers now established, let's move on to red next. Considering that white is on top—at this point, reds can be placed as needed. Here’s one red. Let’s maneuver this red piece into its rightful place to get two reds adjacent, and then align them within the same row. Just to reiterate , rows run horizontally while columns go up and down. We’ve got one individual red aligned, and I can adjust these pieces to position the reds next to each other. Next, let’s bring these two reds together on a horizontal plane. Our red center is now complete.
As previously noted, with white on top and red to the left, blue should go on the right. It might be tempting to leave the oranges where they’re currently positioned, but trust me, you’ll run into challenges if you do that. As a matter of fact, you won't get far since there aren't edge pieces in the combination of red and orange.
External Links
The Joy of Cubing What I suggest is to move the two blue pieces to where the oranges are currently located, taking them out of the potential conflict, and then returning the reds to their appropriate spots. Now we have two blue pieces in place. Let’s gather the other blue pieces next to each other. This can easily be done by aligning them in the same row and then correcting the red pieces accordingly.