Wizard Recommends
 100 % up to
2250zł +200 spins- Massive gaming platform
- Crypto-friendly
- Loyalty program

 120 % up to
1200zł +50 spins- Welcome bonus package
- Loyalty Program
- Participate in Slot Competitions with Huge Prize Pools
How to Create MP3 files from a CD
Recently, I bought an MP3 player. To give you a bit of context, I grew up during the era of the Sony Walkman, a portable cassette player that was incredibly trendy and practical back in the late 70s. I think I even have mine packed away in a box in my garage, along with dozens of cassette tapes.
Nevertheless, I realized it was time to embrace modern technology, and MP3 files seem to be the preferred method of storing music today. I headed to Best Buy, feeling a bit lost about what I needed. After consulting with a young sales associate, I ended up purchasing a SanDisk 'Clip Sport Plus Player.' He explained that I could transfer music to the MP3 player by simply connecting it to my computer using a USB cable, which turned out to be true.
Next, I needed to acquire some MP3 files. At that point, I had none on my computer. I'm a supporter of a music artist on Patreon, which gives me access to MP3 versions of all her songs. I was pleasantly surprised by how quickly I was able to download her tracks onto my computer and then transfer them to the MP3 player. Gamazda I enjoyed that setup for a while, but soon I found myself craving a broader selection beyond just piano music. I wondered how to collect more MP3 files. I had a considerable library of music on iTunes, but it was in a m4a format, whatever that is. I asked a couple of younger friends for advice, and the two popular suggestions were Spotify and Amazon.
However, my research showed that with Spotify, you don’t actually download playable MP3 files for external devices. It seems like a closed system where you can only use their platform to enjoy their music. On the other hand, Amazon allows you to purchase MP3 files, but often you have to buy an entire album. For instance, Amazon asks $23.99 for the Joshua Tree album by U2 in MP3 format.
In my search for alternatives, I came across information suggesting that CDs can be converted to MP3 files. Some guides on the topic required specific apps to be installed, but luckily, it's quite simple to do on a Windows computer without any additional downloads. Here’s how you can achieve this.
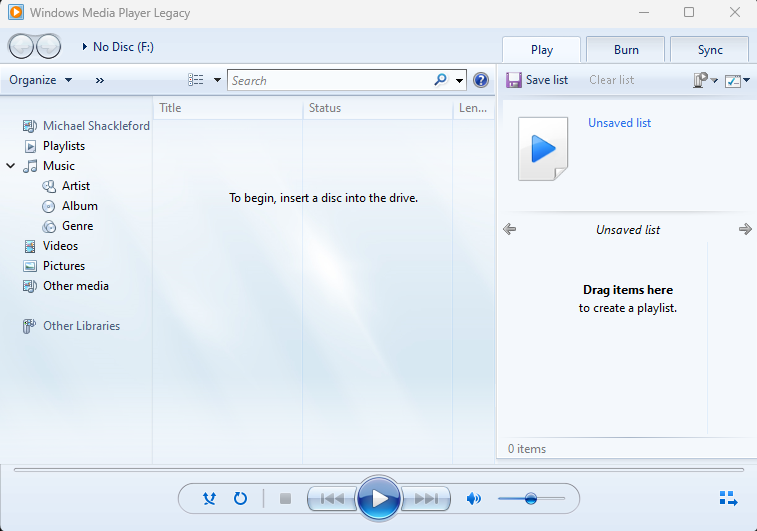
Step 1 – Launch Windows Media Player. On my system, it’s labeled as 'Windows Media Player Legacy.'
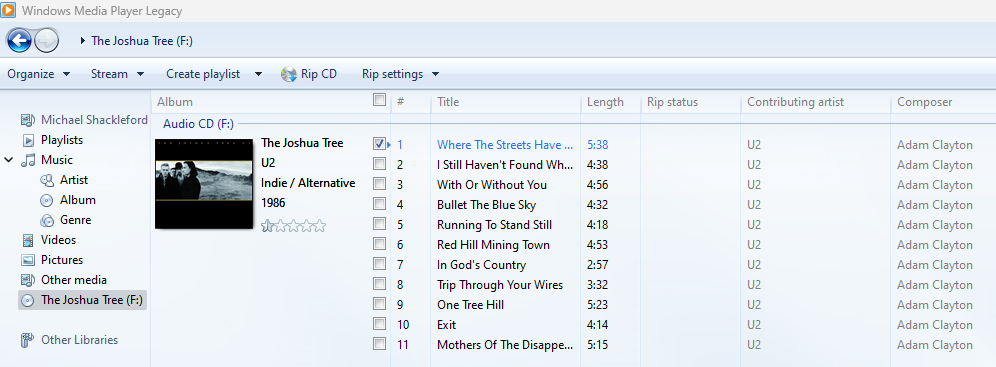
Once you do this, you should see a list of all the tracks contained on the CD.
Step 2 – Put a CD into your CD/DVD drive.
Step 3 – Select the tracks you want to 'rip' to MP3 format. At this stage, you can also modify the audio quality by navigating to Rip Settings → Audio Quality. A helpful video I found suggests that 192 Kbps is typically sufficient for MP3 players.
In my case, the default format for the ripped files was set to MP3. However, if you prefer, you can explore other options under Rip Settings → More options → Rip music → Format. Additionally, you can choose where the files will be saved in this same settings window.
In my example, I chose to rip just 'Where the Streets Have No Name' from the Joshua Tree album. It’s undoubtedly one of my all-time favorite songs, but after all these years, I still haven’t figured out its deeper meaning.
After your selections, click 'Rip CD.' It takes about 30 seconds per track, and once the process is complete, the MP3 files will be saved where you specified in the settings, or in the default location if you didn’t change anything.
It’s quite refreshing to find a straightforward method for handling technology tasks.
In conclusion, I want to express my gratitude to Mister How To and his YouTube tutorial titled
'How To RIP Audio CDs with Windows Media Player (QUICK & EASY).' Until next time, I wish you favorable outcomes in your endeavors. .
Enjoy mathematically strategic approaches and insights for casino games like blackjack, craps, roulette, and many others available to play.